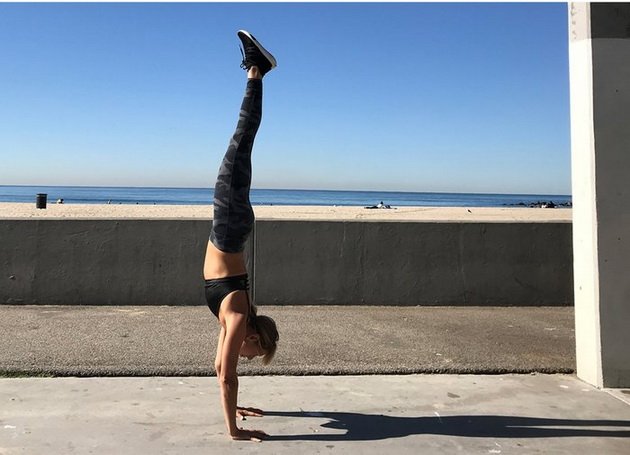
Everyone agrees that the handstand is one of the most spectacular and impressive exercises, especially if you want to take a photo and post it on Instagram.
The problem is that if you didn’t do gymnastics or acrobatics as a child, it will be quite difficult to learn to stand on your hands. Without the right approach, you can spend years without getting into a handstand and holding it for at least a couple of seconds.
Instead of just trying to push off the floor and get into a handstand in the hope of the best, use the wall to build strength, gradually master the more challenging options, and learn techniques that will make you progress quickly and consistently.
If you practice your handstand wisely, you will save a lot of time and frustration. Before you have time to look back, you can easily stand on straight arms without any support!
Step 1: building strength and endurance
The first step to mastering an unsupported handstand is to work against a wall. It may seem that this is not too cool and effective, but exercises against the wall perfectly develop the strength and endurance of the body in the upside down position. It is extremely important to learn how to align the body in a straight line during the stance. The following three strength training exercises will help you build a solid foundation.
Wall Hold
Instead of pushing off the floor with your feet and “jumping” onto the wall, as most beginners do, walk up the wall with your feet and stand with your chest touching the wall. This makes it much easier to master a straight handstand at the very beginning of training. This same technique will help you avoid the bad habit of arching your back with a banana in the future.
To do everything right, place your hands on the ground and your feet on the wall, then slowly walk up until you are upright. Your goal is to place your hands a few inches from the wall. If you can’t get that close yet, do not be discouraged – one of the tasks of the initial stage is for you to learn to understand the sensations that arise in the upside down position. Everything will work out, you just need time and practice.
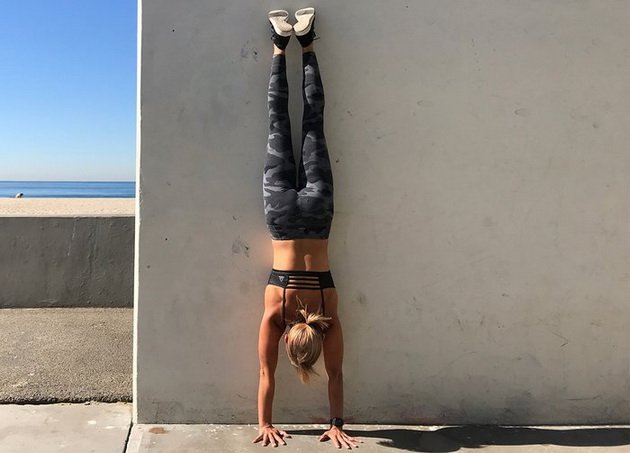
When you are fully upright, contract your core muscles, pull your ribs in, and direct maximum force from your shoulders to the floor. You should feel like you are pushing the floor away from you.
Then stretch your toes, tighten your glutes and quads, and hold the stance! Try to do at least three sets and record the time you can stand against the wall to track your progress. Ultimately, you should learn to hold a handstand against a wall for a minute or more.
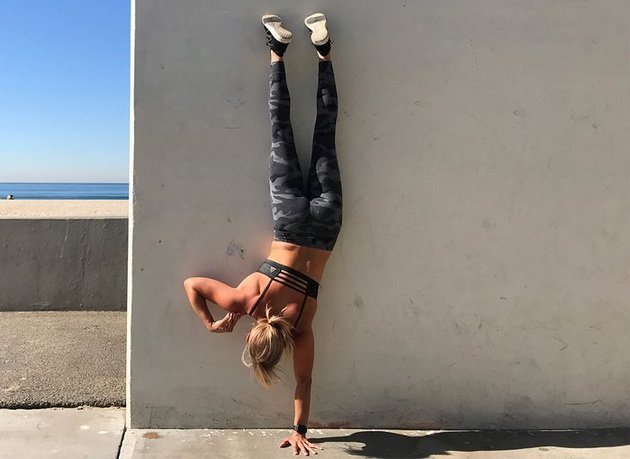
Walk on the wall
Wall Walking is another cool exercise that builds strength and endurance in a handstand and helps you get used to the sensations of a head-down position. As in the first exercise, climb the wall with your feet until your chest is against the wall, and then begin to rearrange your arms and “step” along the wall to the right or left.
For balancing, you can spread your legs – this will also slightly simplify the understanding of the specifics of the movement itself. Move in one direction first, then reverse the motion vector and return to the point from which you started to work out both sides evenly. Remember to direct the force from your shoulders to the floor and keep your core tight throughout the exercise.
Shoulders touching
Another awesome upper body and core stabilizer exercise that will help you really focus on the amount of shoulder effort you need for proper handstand. Plus, the shoulder touch prepares you for a one-arm handstand that you will most likely want to master too.
Climb the wall into a handstand, lean slightly to one side and slowly raise your opposite hand. You can start by simply ripping off your fingers to feel the movement, and then practice raising your hand and touching your shoulder on the same side. This exercise can be done for a time or for a number of repetitions. Use it as a supplement to keeping the stand against the wall.
When you feel more comfortable in the upside-down position and can hold the stand against the wall for at least 30 seconds, start working on your coordination and balancing skills.
Step 2: develop coordination and balance against the wall
You already have the basic skills, but don’t rush to the unsupported handstand. Continue to use the wall as a tool to help you learn to balance and maintain the correct handstand posture. Be sure to keep all muscles tense so that you generate powerful force from your shoulders.
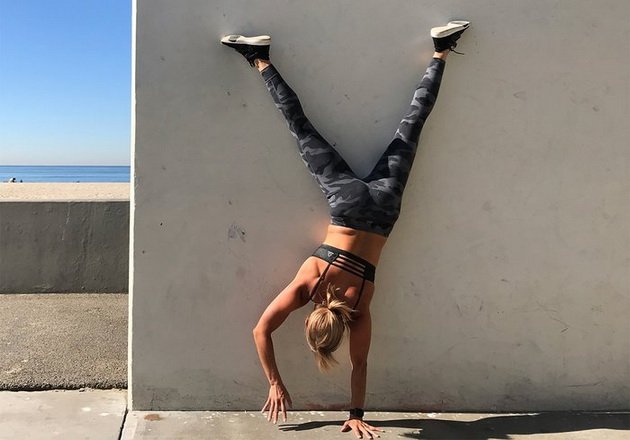
The next step is to move about 30 centimeters away from the wall on your hands. In this case, the pelvis should be located strictly above your hands.
Slowly lift one leg off the wall and lift it over your head so that your shoulders, pelvis and leg are in line. If the leg goes back a little, it’s okay – just focus on keeping your pelvis and shoulders on the same vertical.
Maintaining maximum control, slowly lift your other leg away from the wall and try to balance on your fingers to keep a free stance for a short time. If you fall forward, place your foot back on the wall. If you fall backwards, try a somersault. Falls are an integral part of handstand training and you must understand that falling is okay!
Spread your legs back and forth very slowly to learn to balance your fingertips and align your shoulders and pelvis.
Pro tip: Videotap yourself while exercising to continually measure your progress and make sure you maintain the correct body position. Balancing skill development takes time – don’t force things.
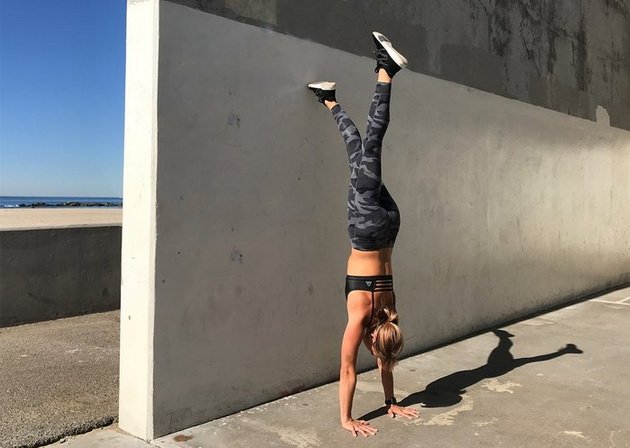
Step 3: Mastering the Free Handstand
Before you start working on an unsupported handstand, you must learn to hold the handstand against a wall for at least 30 seconds. The longer you can stand on your hands against the wall, the easier it will be for you to move to a free standing.
Experiment with standing up by pushing off with your feet or from a standing crease or sitting angle (also known as a power outlet). Most people find it easier to push off with their legs, as strength output requires good flexibility in the shoulder joints and remarkable strength in the muscles of the upper back.
When mastering the exit to the stance due to pushing off with your feet, you must not rush! This technique is mastered through a lot of trial and error. If you push off weakly, you do not get upright, and if you push off too hard, you fall or do somersaults. This step will take time and effort, so be patient.
When you finally feel like you’re ready to start unsupported handstand training, don’t abandon your wall training. When you reach the level of a free handstand, try to spend about half of the time honing the handstand against the wall, and half of the time on the skill of getting into a handstand by pushing and swinging your legs.
Even the best handstand specialists continue to work against the wall to develop even greater strength and endurance, while honing the body position during the handstand. Only when you learn to calmly hold a free handstand for a minute or longer can you spend most of your time off the wall.
Consistency is the key to success
If you are serious about learning to stand on your hands, you need to practice almost every day, even if you only have 5-10 minutes to work out. Be consistent and consistent, and you will learn to stand on your hands before you even figure it out!